Showing posts with label DIY. Show all posts

Wednesday, September 10, 2014

Eyesore Wall Turned Gallery Wall

There is a wall in my house I like to fondly refer to as the problem wall.
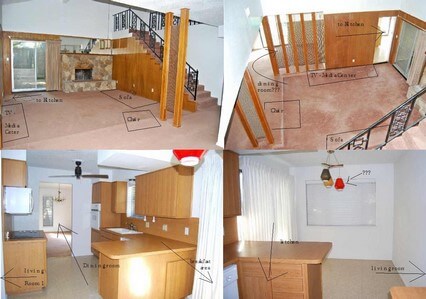
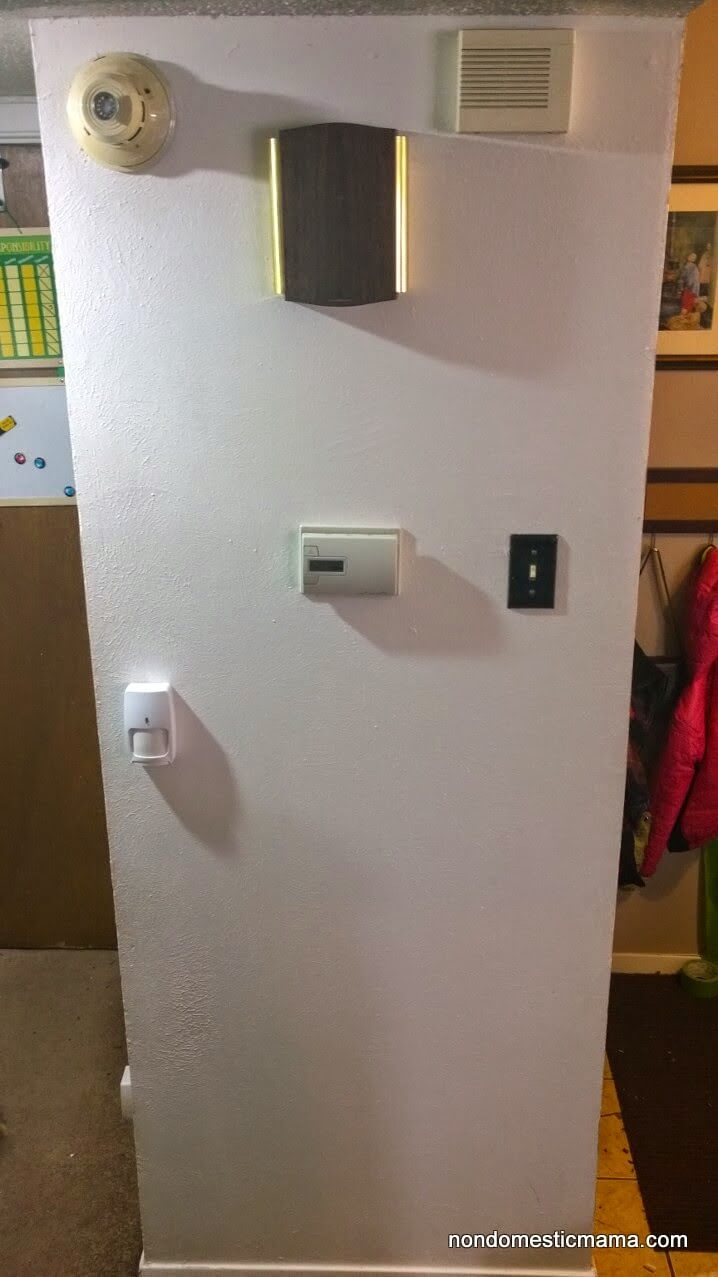
This ugly little wall is nicely located right between the front door and the laundry room door.

The designers of this house put a lot of thought into the location of all the eyesores.  Where should we stick all these ugly things?  Doorbell speaker, alarm speaker, thermostat, smoke detector, motion sensor.
We could put them on the wall next to the laundry room.  Tucked away where no one will ever see them.  But you know what would be even easier?  Sort of but not really.  We could put them a few inches away on the wall that is visible from the entryway, and the hallway, and the stairway, and the dining room, and the living room, and you know EVERYWHERE!  Oooh ya, let's do that.

Seriously.

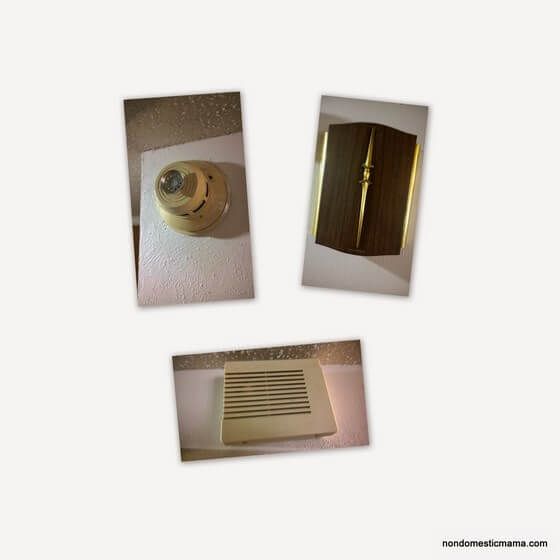
And not only is the stuff not pretty, it's about as ugly as possible.  The alarm speaker and motion sensor are newer.  Yes, we could put this stuff around the corner but this wall already looks ugly.  Let's just add to it.  Ahem.

The smoke alarm is not even functional so I should really remove it.  Even though I know the wires leading to it aren't live, (had them checked) it still makes me nervous to just take it off and have those wires floating in the wall.  So, I will wait until someone who knows what they are doing can remove it.

Let's not even mention the fact that the thermostat is crooked.  Crooked.  For really.

The doorbell is an... antique.  I am not totally in love with the style.
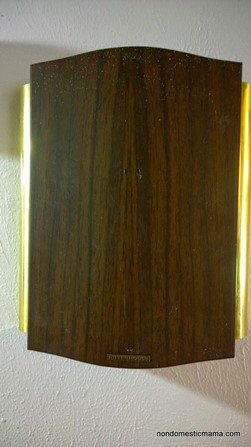
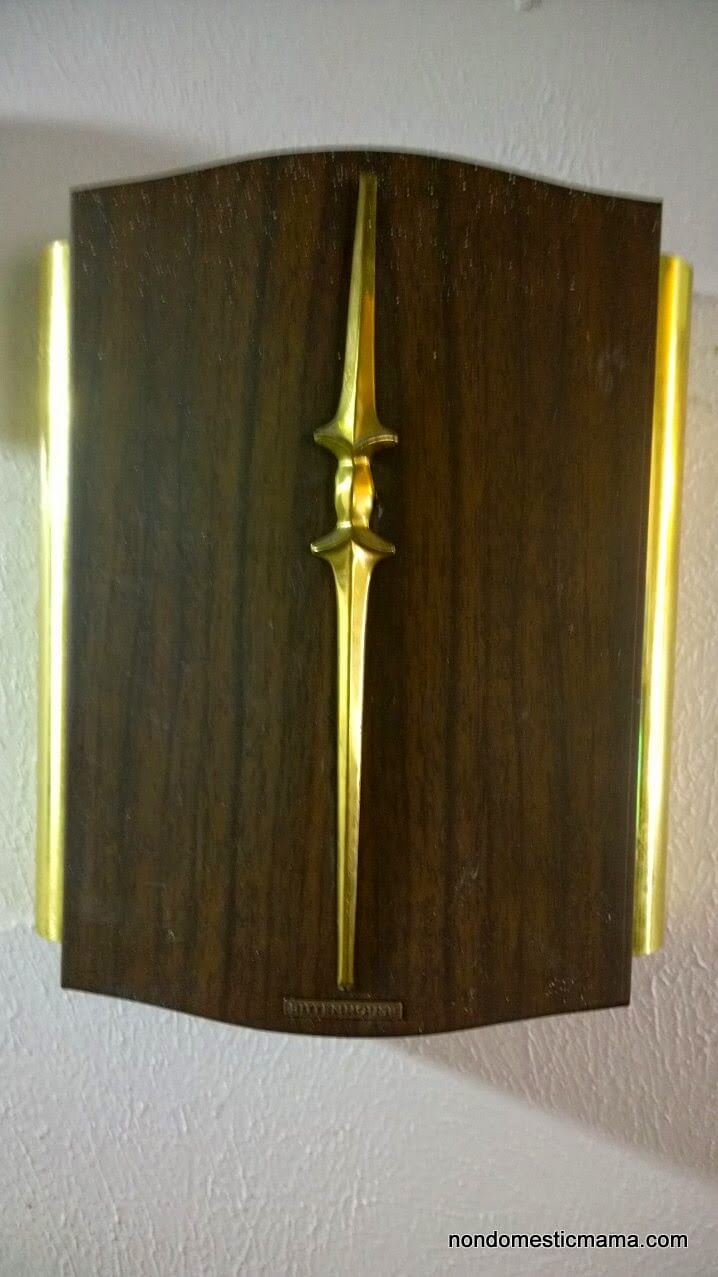
The first thing I did when we moved in was try to eliminate all the brass everywhere.  I did remove the decorative thingy off the front and was considering painting the brown part.  I also removed the side chimes and discovered they are in fact functional so back they went.
After spending much time/energy/angst trying to change it, I decided to just embrace it and work with it.  After all, it is part of the history of the house and would a plain speaker box really be any prettier?

Plus, brass is back in!  Bring back all the gold things we finally managed to get rid of!!!  Right?  I'll never fully understand trends.

At first, I fixated on covering all the uglies but I was worried about the functionality being compromised.  I also worried that covering them would just end up looking like I had covered something up.

Then as I was browsing gallery walls on Pinterest, (I have always had a bit of an obsession with gallery walls) I realized the ones I loved the most had a mixture of frames and other oddities.

So, if I surround the ugly stuff with pretty stuff maybe people will notice the pretties and ignore the uglies?!

Obviously I NEEDED to run right out and start buying stuff to hang on my wall!

Except that wasn't really in the budget.  So, I decided to work with what I had and I could always add to it later.

Friday, April 5, 2013

Toy Organization - FAIL

Jenn is being all helpful over at her blog and teaching us how to properly fold a towel.  Complete with video.

I have had the flu all week and my voice is doing the whole raspy thing so I will spare you the video.

But I thought I could teach you a little something too.

You see, awhile back I came up with a clever way to organize the kids toys.

Then I procrastinated for awhile.

Tried one way and it didn't work well.

Came up with a plan B.

And now I will show you my amazing system to organize and store the kids toys.  Something that will allow them to easily identify their toy storage so they can clean up their own room.

Too good to be true?

Let's find out!

I started with several cubes from the Target Itso collection.  I like these cubes better than the smaller cube shelf ones you see all the time because these are bigger.  Also the cubes are plastic and snap together easily and come apart easily.  This works well for us because we are frequently having to empty out the room when Gremlins attack.  Also they are more water resistant.

Fabric bins of various sizes and colors (Itso brand, the other brands are too small) work well in the cubes to sort toys into.
The problem is, all the toys end up thrown together randomly into the bins and then to find anything, everything gets dumped out creating a huge never ending cycle of mess.

Then I end up spending an entire day sorting toys into various cubes and trying to explain the system to two oblivious children who immediately go back to doing it the way they have always done it.  And all my sorting efforts are just wasted time.  Much like any other form of housework...

Obviously the bins need to be labeled.

But trying to write out cute little labels for the toys won't work well until my kids learn how to read.

I thought about little picture labels but they needed to be really specific for the kids to see what kind of toy when into each bin.

Pictures...  Hmm...  Oh, photos.  Right.  That could work.

But how to attach the photos.

My first attempt was to simply scotch tape the pictures to the bins.  That didn't hold.  The pictures ended up falling off and getting destroyed or lost.

Plan B.

Wednesday, February 29, 2012

The Two Day Plan

It was Thursday.

My mom-in-law was coming out on Saturday to celebrate her birthday.

This gave me two full days to paint the homeschool room and clean up the mess.

Thursday to paint.

Friday to clean.

Fool proof plan.

So, I pulled all the furniture away from the walls, pulled out my painting supplies and got started.

 I started with primer.
 Giving the walls a nice, consistent, even coat.
 With several breaks to kiss owies, serve emergency (I'm starving) snacks, and take the princess to the potty.
 As you can see, I consider it of utmost importance, to keep the primer coat from looking sp lo tc hy .

 At this point, I received a call from my husband, informing me he was on his way home from work.

5:00 already!?

That's ok.  I have all evening to finish painting and then all day tomorrow to clean up.

Him:  "Did you take the trash out this morning?"  (I had forgotten to take the trash out on Tuesday)

Me:  "No, today isn't trash day."

Him:  "You're kidding right?  Today is trash day."

Me:  (laughing to myself and speaking in an ever so slightly condescending voice) "No, honey.  Trash day is Friday not Thursday.  Sometimes I get confused too."

Him:  "What day do you think it is?"

Me:  "It's Thursday."

Him:  "It's Friday."

Me:  "No, it can't be Friday because you didn't do your podcast last night."

Him:  "It was cancelled this week.  Today is Friday."

Me:  "Please tell me you are kidding!"

Him:  "Nope."

I then turned around and took one look at my house.

Tuesday, November 15, 2011

Stuff I Want: Doors / Stuff I Did: Curtains

When I walked into my house for the very first time and saw the living room I fell in love.  Not as much with how it looked then but with how I envisioned it looking.  It had so many of the features I was looking for.  I instantly felt at home.  I just knew it was the ONE.  It was actually the first house we looked at so, because we didn't want to be the people who just bought the first house we saw, we went around looking at all the other houses.  Then we came back and bought this one.

This is what the house looked like.
This is actually the picture from the listing (with my husband's notes) because we, in our enthusiasm to move in, never took any before pictures.
What I loved?  The stone fireplace.  The space.  The two story vaulted ceiling.  I hadn't really wanted a two story house but if I was going to have one I wanted the stairs to be spectacular.  When I saw that railing it took my breath away!  How cool is that railing?  I had never seen anything like it.  Best of all check out those doors!

Ok.  Maybe not those doors in particular.  But the doors they could be!

Something like...

Source: pella.com via Rachael on Pinterest

Except white.  With Bordeaux shades.  Exactly like this.

Shortly after we moved in I decided to price my new doors.  Just to know.  So that the next time I had a few hundred dollars burning a hole in my pocket I would be prepared.

I gave the salesperson all my specifications.  I knew exactly what I wanted and would settle for nothing less.

He gave me the grand total.

Tuesday, October 4, 2011

The Money Pit


I know I have been terrible about keeping up with my blog.  I apologize because I know you have all been pining away in my absence.  The only excuse I really have is that Summer is always a little stressful around here.  And hot.  Then Summer finally gives way to Fall.

Speaking of Fall, the stairs in my house have been caving in for awhile now.  Yes, caving in.  Like in that movie.  You know the one.  Where the people buy that beautiful house and it falls apart.  You know.  The story of my life.
Thankfully my dad came to the rescue yet again and cut a hole in our closet wall to access under the steps.
And we discovered a long lost treasure.

Friday, July 15, 2011

Stuff I Did: My Less Ugly Bathroom

Remember my ugly bathroom?
Ugly!
Ugly counter top!

Ugly dated cabinets.
More specifically, do you remember what was under the sink in my ugly bathroom?
Yuck!
Well for obvious reasons something had to be done about that.

So, while I was waiting for Vanilla Ice to swing by and fix my bathroom . . .

I decided to take matters into my own hands.

Monday, April 18, 2011

Stuff I Did: Yet Another Shelf

I'm posting a bit late today because I was pretty busy all day working on assembling a shelf for the kid's room.  I know what you're thinking . . . "It took you the entire day to put together one shelf?"  Of course not.  That would be crazy.  I actually put the shelf together about a month ago.  It has since been laying down right in the middle of the floor of the dining room.  We have been walking around it, tripping on it, kicking it, falling over it.  See, as I am apt to do, I got the sudden urge to put together the shelf before I really thought it through.  My husband then, as he is apt to do, pointed out the flaw in my plan.  We had not yet entirely finished the floor in the kid's room and so had no place to put the shelf.  So it sat there.

Shelf on the Floor
This weekend we finally put in the last few pieces.  What took us so long to finish it?  Well, we haven't had a free weekend for awhile.  We have had people in hospitals and bridal showers and birthday parties.  In all honesty though I might have procrastinated a teensy bit actually ordering the last few pieces.  Maybe because I kept forgetting or wanted to wait till payday.  Maybe because I knew once we had those last few pieces I would have to get serious about getting that room clean and back in order.  Hmm . . . probably mostly the latter.
Unfinished Floor
What did I spend today doing then?  I spent the day putting the back on the shelf.  Logically I realized that I should probably leave the back off the shelf if I was going to be leaving it lying in the middle of the room.  I figured the kids would be climbing all over it and step right through it.  It was a pretty good call I think.

I had the bright idea awhile back to use wrapping paper to cover the back of the shelf and make it all pretty like.  It was of course right after I had finished assembling the last shelf.  I attempted to take the back off but that was not an option.  Rather than the nails coming back out, the cardboard-like back threatened to rip right apart.  So I decided it wasn't worth the effort.
Pretty Wrapping Paper
Today I did attach the pretty paper to the back of the shelf before I nailed it on.
Shelf with Pretty Wrapping Paper

Smart right?
Closeup of Shelf with Pretty Wrapping Paper
I am proud to announce the shelf is officially fully assembled.  I think it came out well.  It looks all pretty and stuff.
Pretty Shelf - See I can be all crafty like!
Once I get all the toys and books put up on the shelf it will probably cover it up of course.  But I will know.  It's all pretty underneath all that stuff.  I even have the pictures to prove it.
Like how I coordinated the colors of the paper with the lids?  Totally on purpose . . . ;)
After it was all finished I was exhausted!  Had to take the rest of the day off.  I'll work on the rest of the room tomorrow . . . maybe . . .

Yes, I do realize I just wrote yet ANOTHER blog post about a shelf.  Maybe I should have named my blog Shelf Obsessed Non-Domestic Mama?

Monday, January 31, 2011

Stuff I Did: New (Puzzle Foam Mat) Floor

This weekend was spent installing a new floor in the kids room.

You may recall our incident with the pipe gremlins that resulted in one ruined carpet and two kids without a room of their own.


After all the plumbing was repaired and enough time had elapsed to be relatively sure (holding our breath) that there would not be a re-occurrence (again) the time had finally come to install a new floor.   I still really wanted to put cork in but we were and are still wary about possible future leaks.  Excess funds haven't exactly been flooding in (pardon the pun) either so we had to come up with a more economical solution.

Monday, January 24, 2011

Taking Baby Steps

Clearly Charming Blue Baby Feet Heart Locket Charm Baby, Child Theme I get easily overwhelmed.  I can sit and look around the house at all the projects and messes I need to tackle and wear myself just thinking about it.  It's a serious problem of mine.  I just don't even know where to begin so I don't or I feel like I am fighting a losing battle trying to clean faster than the mess can be generated.  I am also not naturally organized.